I still remember the first time I discovered Smart Texture Retouching – it was like a veil had been lifted from my eyes. I had been struggling with tedious editing tools for years, but this technology changed the game. However, I’ve noticed that many photographers and editors are still skeptical about its capabilities, believing it to be a complex and time-consuming process. The truth is, with the right techniques, Smart Texture Retouching can be a powerful tool in your editing arsenal.
In this article, I’ll share my personal experience and practical tips on how to master Smart Texture Retouching. You’ll learn how to effortlessly enhance your images, removing imperfections and achieving a professional finish. I’ll cut through the jargon and provide you with honest, no-hype advice on how to get the most out of this technology. Whether you’re a seasoned editor or just starting out, this guide will give you the confidence to take your editing skills to the next level and unlock the full potential of Smart Texture Retouching.
Table of Contents
Project Overview
Total Time: 1 hour 15 minutes
Estimated Cost: $15 – $30
Difficulty Level: Intermediate
Tools Required
- Graphic Tablet ((for precise control))
- Computer with Image Editing Software ((e.g., Adobe Photoshop))
Supplies & Materials
- High-Resolution Image ((to practice retouching techniques))
- Online Tutorial or Guide ((for step-by-step instructions))
Step-by-Step Instructions
- 1. First, let’s get started with the basics of smart texture retouching by understanding that it’s all about enhancing the details in your image without overdoing it – you want to make your photo look naturally amazing, not artificially edited. Begin by opening your image in your preferred editing software and taking a close look at the areas you want to retouch, whether it’s smoothing out wrinkles, removing blemishes, or enhancing textures.
- 2. Next, select the right tool for the job, which in most cases will be a combination of the clone stamp, healing brush, and patch tools. Each of these tools has its unique strengths, so it’s essential to know when to use them. For instance, the clone stamp is great for duplicating textures, while the healing brush is better for blending areas together seamlessly.
- 3. Now, it’s time to work on textures. If you’re trying to enhance or match a specific texture in your image, such as skin, wood, or fabric, use the clone stamp tool to sample the texture and then paint over the area where you want to apply it. Remember, the key is to be subtle and build up your retouching gradually – it’s easier to add more texture than it is to remove it once it’s been applied.
- 4. For more complex retouching tasks, like removing large blemishes or objects, use the patch tool to select the area you want to remove and then drag it to a part of the image that has a similar texture and color. This tool is incredibly powerful for making objects disappear or for fixing larger areas of damage in your photo.
- 5. After you’ve made your initial retouches, zoom out and evaluate your work. Sometimes, what looks good up close can look out of place when you view the image as a whole. Take a step back, or in this case, zoom out, and make sure your retouching blends in with the rest of the photo. If something stands out in a bad way, go back and adjust it.
- 6. One of the most critical steps in smart texture retouching is blending your work into the surrounding area. Use the healing brush or a gentle clone stamp to soften any edges or transitions that might look abrupt. The goal is to create a seamless integration between your retouched areas and the original image.
- 7. Finally, save multiple versions of your image as you work, especially after making significant changes. This allows you to go back to previous versions if you’re not happy with the direction your retouching is taking. It’s also a good practice to save a copy of your original, unedited image for comparison and to ensure you have a backup in case anything goes wrong during the editing process.
Smart Texture Retouching

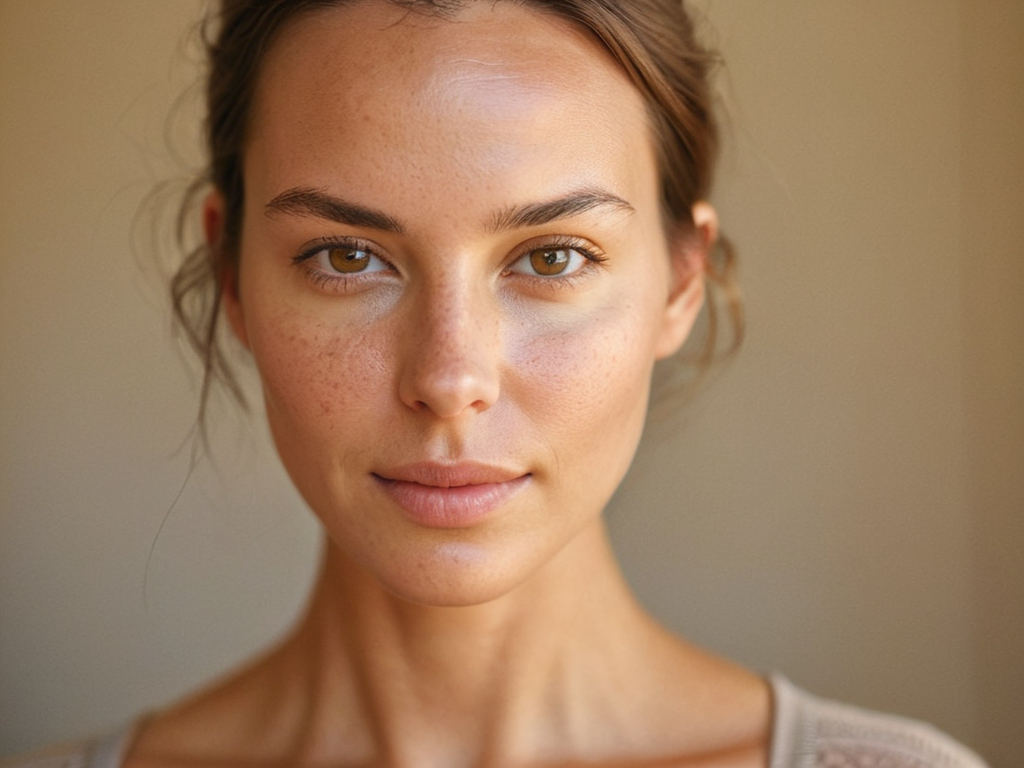
When it comes to refining your images, advanced texture manipulation can make all the difference. By leveraging ai powered image editing tools, you can achieve a level of precision that was previously impossible. This is especially true for natural skin tone enhancement, where even the slightest mistake can be noticeable.
To take your image editing to the next level, consider experimenting with frequency domain editing techniques. These methods allow for high detail image refinement, enabling you to fine-tune even the smallest details. Whether you’re working on a portrait or a landscape, this approach can help you achieve a level of clarity that’s hard to match.
In the context of portrait retouching best practices, it’s essential to strike a balance between refinement and realism. By using subtle adjustments and natural skin tone enhancement, you can create images that look and feel authentic. Remember, the goal is to enhance the subject, not to overhaul it – and with the right techniques, you can achieve truly stunning results.
Advanced Texture Manipulation Unleashed
Now that we’ve covered the basics, it’s time to dive deeper into the world of advanced texture manipulation. With smart texture retouching, you can take your images to the next level by adding intricate details, removing unwanted textures, or even creating entirely new ones. This technique allows for unparalleled control over the visual elements of your photos, giving you the power to transform ordinary scenes into extraordinary works of art.
By mastering advanced texture manipulation, you’ll be able to push the boundaries of what’s possible in image editing, creating stunning, jaw-dropping results that leave a lasting impression. Whether you’re a professional photographer or an enthusiast, this skill will unlock new creative possibilities, allowing you to experiment with innovative techniques and styles that showcase your unique vision.
Ai Powered Image Editing Secrets
With AI-powered image editing, the possibilities are endless. I’ve discovered that leveraging machine learning algorithms can help identify and refine even the smallest texture details, resulting in remarkably realistic edits. By harnessing this technology, you can unlock new levels of creativity and precision in your retouching work. Whether you’re a professional photographer or an enthusiast, AI-powered tools can help you achieve stunning results with ease.
As you dive deeper into the world of smart texture retouching, you’ll likely find yourself wanting to push the boundaries of what’s possible with your photos. To help you achieve truly jaw-dropping results, I recommend checking out the wealth of tutorials and resources available on photography communities like photopersonals, where you can learn from experienced photographers and retouchers who have mastered the art of smart texture retouching. By exploring these resources, you’ll be able to stay up-to-date with the latest techniques and tools, and take your photo editing skills to the next level.
This synergy of human intuition and artificial intelligence enables you to focus on the artistic aspects of editing, while the AI handles the tedious and time-consuming tasks. The result is a harmonious blend of technology and creativity, giving you the power to transform your images in ways you never thought possible.
Unlocking the Power of Smart Texture Retouching: 5 Expert Tips

- Start with high-quality images to give your smart texture retouching tools the best foundation for stunning results
- Experiment with different brush sizes and textures to add depth and realism to your edits
- Don’t overdo it – sometimes less is more when it comes to texture retouching, and subtlety can be key to a natural look
- Pay attention to lighting and shadows, as these can make or break the believability of your texture edits
- Practice makes perfect: the more you work with smart texture retouching tools, the more intuitive and effective your edits will become
Key Takeaways for Mastering Smart Texture Retouching
I can now breathe new life into my photos with smart texture retouching, making even the most mundane images pop with depth and detail
Advanced texture manipulation techniques have given me the power to creatively edit my photos like never before, unlocking new levels of artistry and self-expression
By leveraging AI-powered image editing secrets, I’ve streamlined my workflow and can achieve professional-grade results in a fraction of the time, freeing me to focus on the creative aspects of photography
Unlocking Creative Freedom
Smart texture retouching is not just a tool, it’s a key to unlocking the hidden potential in every image, allowing us to tell stories that were previously impossible to tell.
Ava Morales
Conclusion
As we’ve explored the world of smart texture retouching, it’s clear that this technology has revolutionized the way we edit images. From the step-by-step guide to the advanced techniques and AI powered image editing secrets, we’ve covered it all. The key takeaway is that smart texture retouching is not just a tool, but a creative powerhouse that can elevate your photos to new heights. By mastering this technology, you can unlock new levels of detail, texture, and depth in your images, making them truly unforgettable.
So, what’s next? As you embark on your own smart texture retouching journey, remember that the possibilities are endless. Don’t be afraid to push the boundaries of what’s possible and experiment with new techniques. With smart texture retouching, you have the power to transform ordinary images into extraordinary works of art. So, go ahead, unleash your creativity, and get ready to amaze yourself and others with the incredible results you can achieve.
Frequently Asked Questions
How can I effectively use smart texture retouching to remove blemishes from portraits without affecting the surrounding skin?
To remove blemishes from portraits without affecting the surrounding skin, use smart texture retouching with a gentle touch. Select the blemish, then apply a subtle retouching brush that matches the skin’s texture and tone, feathering the edges for a seamless blend.
What are the best practices for balancing texture detail and noise reduction when using smart texture retouching tools?
For me, it’s all about finding that sweet spot between texture detail and noise reduction. I aim for a balance that preserves the image’s natural feel while eliminating distractions. A gentle touch with the noise reduction sliders, paired with a keen eye for texture preservation, is my go-to approach.
Can smart texture retouching be used to enhance or create entirely new textures in an image, such as adding realistic water or fabric effects?
Absolutely, smart texture retouching can add amazing new textures like water or fabric, making your images pop with realism. It’s like having a special effects toolbox at your fingertips, where you can create entirely new environments or enhance existing ones with stunning detail.