I still remember the first time I stumbled upon String Art Patterns – I was amazed by the intricate designs and the way they seemed to come alive on the wall. But what really drew me in was the misconception that creating these patterns required some sort of artistic genius or extensive experience with crafts. The truth is, with a little patience and practice, anyone can master the art of string art. It’s all about experimenting with different patterns and techniques to create unique and captivating designs.
As you continue to explore the world of string art, you may find yourself looking for new and exciting ways to connect with like-minded individuals who share your passion for DIY projects and creative expression. For those seeking a community that embraces self-expression, a great place to start is by checking out online forums or platforms that cater to adults with similar interests, such as adult personals australia, which can be a valuable resource for finding local meetups, workshops, or even just inspiration from others who are pushing the boundaries of what’s possible with string art and beyond.
Table of Contents
In this article, I’ll share my personal experience and practical tips for getting started with string art. You’ll learn how to choose the right materials, create intricate patterns, and troubleshoot common issues that may arise during the process. Whether you’re a seasoned crafter or a beginner looking to try something new, this guide will provide you with the honest and straightforward advice you need to take your string art to the next level. By the end of this article, you’ll be equipped with the knowledge and confidence to create your own stunning String Art Patterns and add a personal touch to your home decor.
Project Overview
Total Time: 1 hour 30 minutes
Estimated Cost: $10 – $30
Difficulty Level: Easy
Tools Required
- See details in content
Supplies & Materials
- See details in content
Step-by-Step Instructions
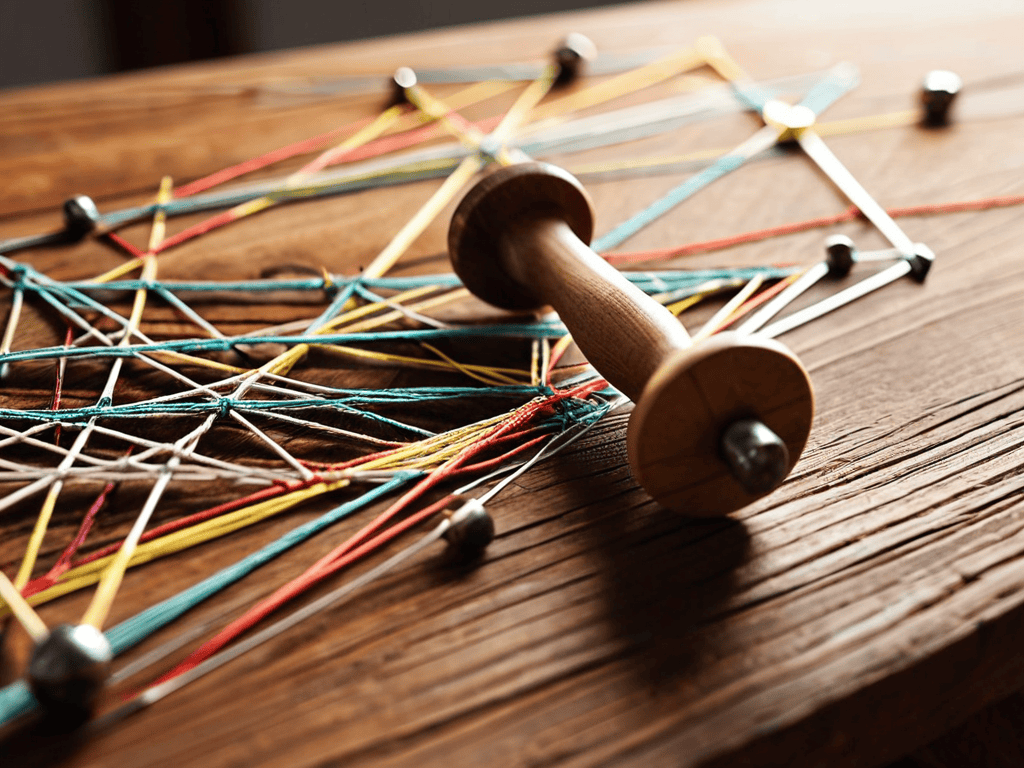
- 1. First, let’s start by preparing our materials, which include a wooden board, a set of nails, a hammer, and of course, the string. It’s essential to choose a high-quality string that is durable and has the right amount of texture to create the desired pattern.
- 2. Next, we need to create a design or pattern on our wooden board. This can be done by drawing a simple shape or a complex design, depending on your skill level and preference. Remember to keep it simple and symmetrical for your first few attempts to ensure the best results.
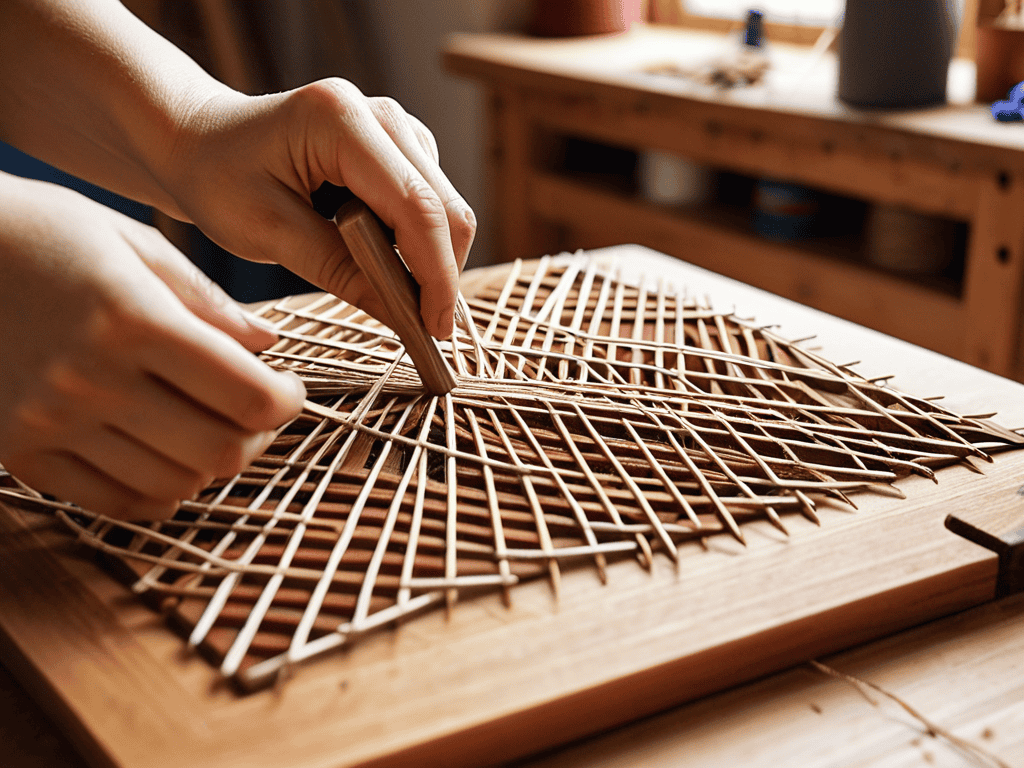
- 3. Now, it’s time to start hammering the nails into the wooden board. Make sure to space them out evenly, following the design or pattern you created earlier. It’s crucial to be patient and precise during this step, as the placement of the nails will determine the overall look of your string art.
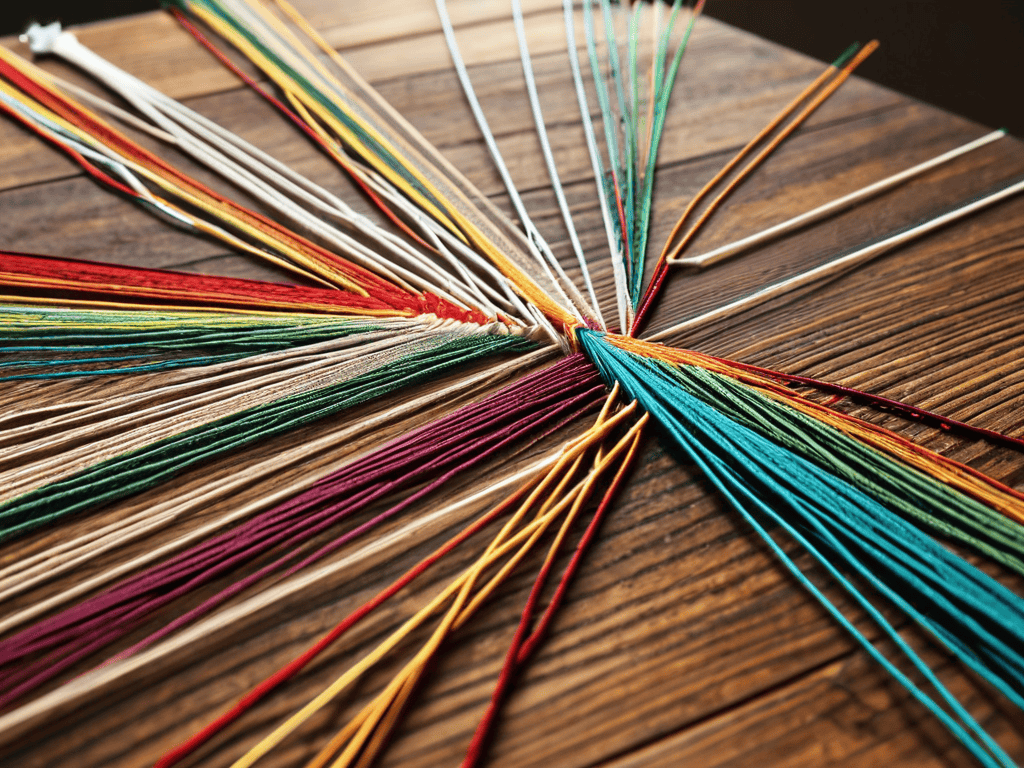
- 4. With the nails in place, we can start threading the string through them. Begin by tying one end of the string to a nail and then start weaving it through the other nails, following your design or pattern. Don’t be afraid to experiment with different patterns and see what works best for you.
- 5. As you continue to weave the string, you’ll start to see your design take shape. Make sure to keep the string taut, but not too tight, to avoid pulling the nails out of the board. It’s also important to maintain a consistent tension to achieve a uniform look.
- 6. Once you’ve completed your design, tie off the end of the string to secure it in place. Take a step back and admire your handiwork – you should be proud of yourself for creating something truly unique and visually striking.
- 7. Finally, to add a finishing touch, you can apply a coat of varnish or paint to the wooden board to protect it and enhance the colors of the string. This is also a great opportunity to get creative with colors and add an extra layer of depth to your string art.
Unlocking String Art Patterns
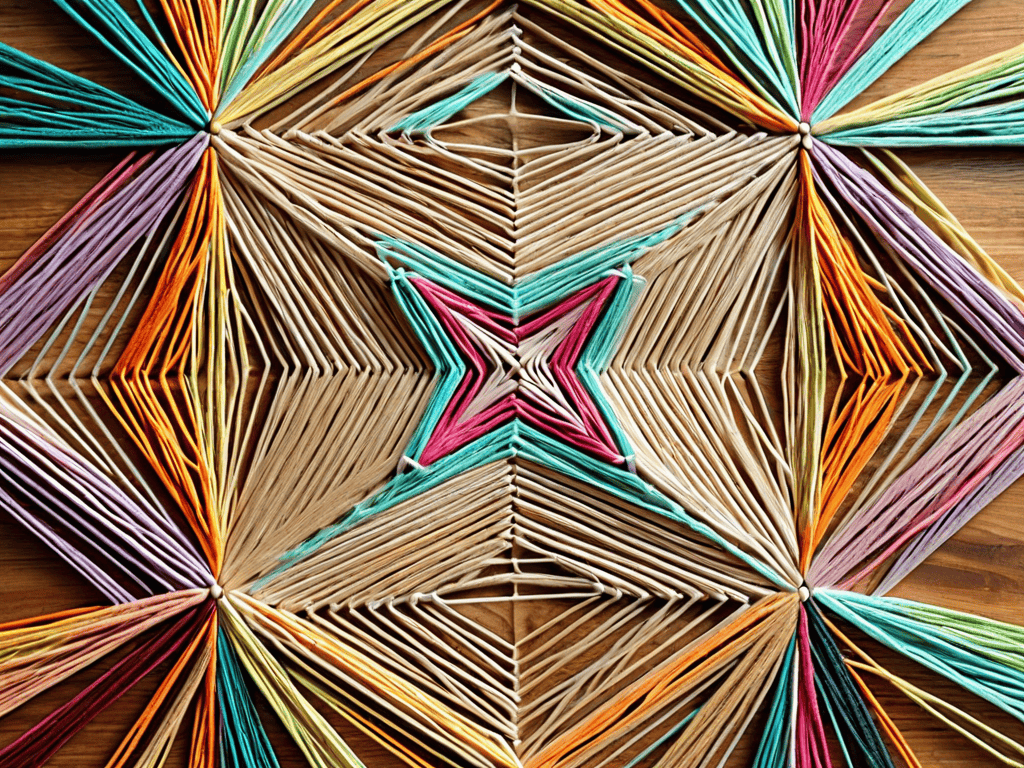
To take your diy string art kits to the next level, consider experimenting with geometric pattern designs. These intricate patterns can add a touch of sophistication to your creations, making them truly unique. By combining different thread color combinations, you can create visually striking pieces that are perfect for string art wall decor ideas.
When working with wooden board string art, it’s essential to plan your design carefully. Take inspiration from nail art designs inspiration and think about how you can adapt those ideas to your string art project. Bold and bright colors can make a significant impact, while more subdued tones can create a sense of calm. Remember to balance your design elements to achieve a harmonious look.
As you explore different string art techniques, don’t be afraid to try new things and make mistakes. String art for beginners can be intimidating, but with practice, you’ll develop your skills and style. By pushing the boundaries of what’s possible with string art, you can create stunning pieces that showcase your creativity and attention to detail. With patience and dedication, you can unlock the full potential of this versatile craft and create truly breathtaking works of art.
Geometric Designs With Diy Kits
Geometric designs are a great way to add some visual interest to your string art projects. With DIY kits, you can easily create intricate patterns and shapes that will elevate your art to the next level. From simple triangles and squares to more complex designs like chevrons and mandalas, the possibilities are endless. You can experiment with different colors and patterns to create unique and eye-catching pieces.
Using a DIY kit, you can create geometric designs with ease, even if you’re a beginner. The kits usually include pre-cut strings, a wooden board, and a pattern guide, making it easy to get started. Simply follow the guide, weave the strings, and watch your design come to life. With a little patience and practice, you can create stunning geometric string art pieces that will impress anyone.
Wooden Board Creations With Nail Art Inspiration
To add a rustic touch to your string art, consider using wooden boards as the base. This combination of natural wood and intricate string patterns creates a unique visual appeal. You can find wooden boards in various sizes and shapes, making them versatile for different projects. Look for boards with interesting grain patterns or knots to add character to your art.
Nail art inspiration can elevate your wooden board creations. Experiment with different nail lengths, colors, and arrangements to create geometric patterns, shapes, or even text. The contrast between the wooden board and the nails will add depth and visual interest to your string art. This blend of materials and techniques will result in a distinctive piece that showcases your creativity.
Weaving Wisdom: 5 Essential Tips for Mastering String Art Patterns
- Start with simple patterns and gradually move to complex designs to develop your skills and build confidence
- Choose the right type of string or thread for your project, considering factors like color, texture, and durability
- Experiment with different materials for your base, such as wood, cardboard, or even fabric, to add unique textures and interests
- Pay attention to tension and spacing when weaving your strings, as these can make or break the visual impact of your design
- Don’t be afraid to make mistakes – they can often lead to unexpected and exciting new patterns, so be prepared to adapt and evolve your design as you go
Key Takeaways for Stunning String Art
Experiment with unconventional materials and patterns to add a personal touch to your string art creations
Combine geometric designs with DIY kits or nail art inspiration on wooden boards to unlock new dimensions of creativity
Remember, practice and patience are key to mastering the art of string art, so don’t be afraid to try new things and make mistakes along the way
The Beauty of Strings
As the threads intersect, they not only form a pattern, but a testament to the human touch – a reminder that even in the most mundane, lies a profound beauty waiting to be woven.
Ava Morales
Conclusion
As we conclude our journey through the world of string art patterns, it’s essential to recall the basics that make this art form so unique and captivating. From geometric designs to wooden board creations, we’ve explored various techniques and inspiration sources. By following the step-by-step guide and unlocking the secrets of string art patterns, you’ve gained the skills to create stunning pieces that showcase your creativity and patience. Remember, the key to mastering string art lies in experimentation and practice, so don’t be afraid to try new patterns and designs.
As you embark on your string art journey, keep in mind that the true beauty of this craft lies in its ability to transform ordinary materials into extraordinary works of art. With every thread and every nail, you’re not just creating a piece of art – you’re telling a story, evoking emotions, and pushing the boundaries of what’s possible. So, let your imagination run wild, and let the strings guide your creativity. The world of string art is full of endless possibilities, and with dedication and passion, you can weave your own magic and create something truly remarkable.
Frequently Asked Questions
What are some common mistakes to avoid when creating intricate string art patterns?
When creating intricate string art patterns, beware of uneven tension, which can cause warping or sagging. Also, avoid using too many colors, as this can lead to visual overload. Additionally, don’t forget to plan your design carefully, taking into account the size and scale of your project, to ensure a polished and professional finish.
How can I incorporate different materials, such as yarn or wire, into my string art designs?
Let’s mix things up – try swapping traditional string for yarn or wire to add unique textures and dimensions to your art. Yarn can create a soft, bohemian vibe, while wire can add an edgy, industrial feel. Experiment with different materials to discover fresh styles and push your creativity to new limits.
Are there any specific string art patterns that are more suitable for beginners, and how can I gradually move on to more complex designs?
For beginners, start with simple patterns like hearts or stars, then graduate to more intricate designs like mandalas or animals. As you gain confidence, experiment with layered strings and mixed materials to add depth and texture, gradually moving on to more complex geometric patterns and abstract designs.