I still remember the first time I fell in love with Limewash Wall Paint – it was during a visit to my grandparents’ quaint rural town, where the old farmhouse had been beautifully restored with this timeless finish. There’s a common myth that limewash is only suitable for rustic or vintage-themed homes, but I’m here to tell you that’s just not true. In fact, limewash wall paint can add a touch of warmth and character to any space, from modern apartments to traditional houses. I’ve seen it work its magic in my own urban sketching adventures, where a simple splash of limewash can transform a dull city wall into a work of art.
As someone who’s passionate about blending functionality with creative aesthetics, I’m excited to share my practical advice on how to work with Limewash Wall Paint. In this article, you’ll get honest and straightforward tips on how to choose the right shade, prepare your walls, and apply the paint like a pro. Whether you’re a DIY enthusiast or a homeowner looking to give your space a fresh new look, I’ll guide you through the process with ease. So, let’s dive in and explore the world of limewash together, and discover how this beautiful finish can elevate your home’s style and charm.
Table of Contents
Project Overview
Total Time: 4 hours 30 minutes
Estimated Cost: $50 – $100
Difficulty Level: Intermediate
Tools Required
- Paintbrushes (various sizes)
- Roller Extension Pole (for large areas)
- Paint Tray (for roller)
- Drop Cloths (for floor protection)
- Ladder (sturdy, 6 feet tall)
- Sandpaper (for surface preparation)
- Masking Tape (for trim protection)
Supplies & Materials
- Limewash Powder (available at hardware stores)
- Water (for mixing with limewash powder)
- Primer (optional, for improved adhesion)
- Paint Roller Covers (microfiber or wool)
- Gloves (for protection from limewash)
Step-by-Step Instructions
- 1. To start your limewash wall paint journey, gather your materials, which should include a high-quality limewash paint, a paintbrush or roller, a paint tray, and a drop cloth to protect your floors from any spills. It’s also essential to read the instructions on the paint can carefully, as different brands may have specific application guidelines.
- 2. Next, prepare your walls by cleaning them thoroughly with a mild detergent and water to remove any dirt, grime, or grease that might interfere with the paint’s adhesion. Allow the walls to dry completely before proceeding, as limewash paint works best on a dry surface. This step is crucial for achieving a smooth, even finish.
- 3. Now, it’s time to apply the primer, if necessary. Some limewash paints come with a built-in primer, but if yours doesn’t, you’ll need to apply a separate primer first. This ensures better coverage and adhesion of the limewash paint. Remember to follow the manufacturer’s instructions for the primer application and drying times.
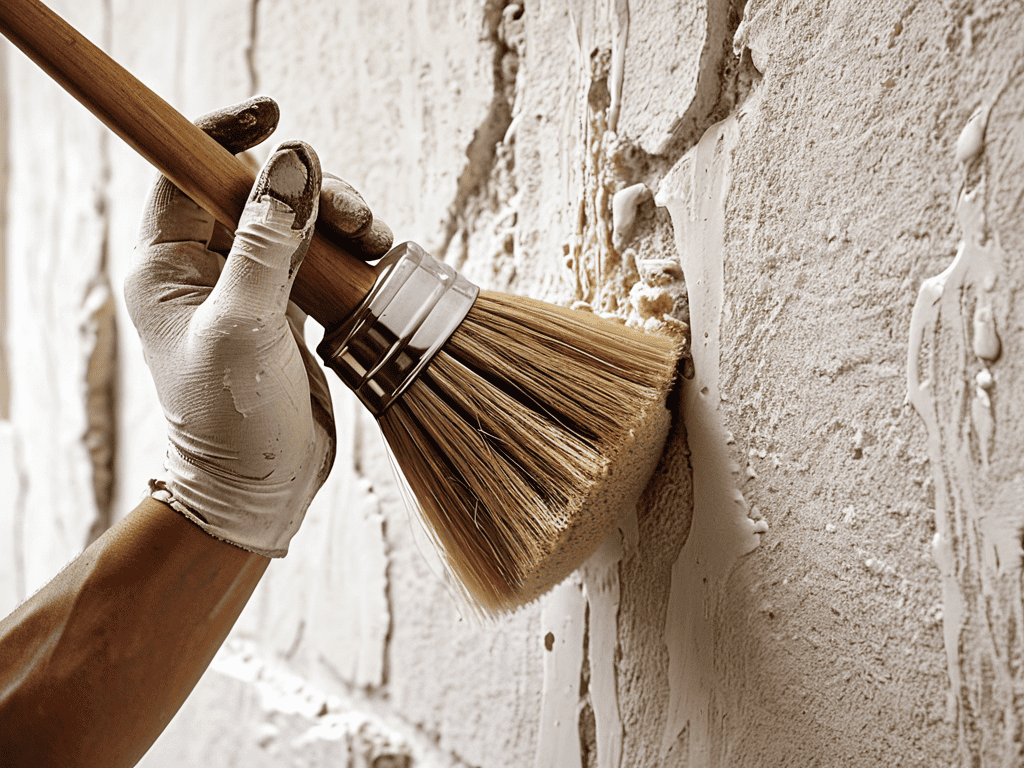
- 4. With your walls prepared, you can start applying the limewash paint. Begin by dipping your paintbrush or roller into the paint tray and working in small sections. Use light, even strokes to cover the entire wall, working from the top down to prevent drips and streaks. It’s essential to maintain a consistent pattern to achieve the desired aesthetic.
- 5. As you continue applying the limewash paint, pay attention to the coverage. Depending on the brand and type of paint you’re using, you may need to apply multiple coats to achieve the desired color and finish. Be sure to allow each coat to dry completely before applying the next one, as this will help prevent unevenness and ensure a smooth finish.
- 6. Once you’ve completed the final coat, step back and evaluate the results. If necessary, you can touch up any areas where the coverage may be uneven or the paint may have gotten on surrounding trim or molding. This is also a good time to add any decorative elements, such as trim or molding, to enhance the overall look of your space.
- 7. Finally, seal your limewash paint, if desired. While not always necessary, a clear sealant can help protect the paint from stains and fading over time. Be sure to choose a sealant specifically designed for use with limewash paint, as other types may damage the finish or alter its appearance. With your limewash wall paint complete, you can now enjoy your beautifully transformed space, filled with the warm, soft glow of this timeless and elegant finish.
Limewash Wall Paint
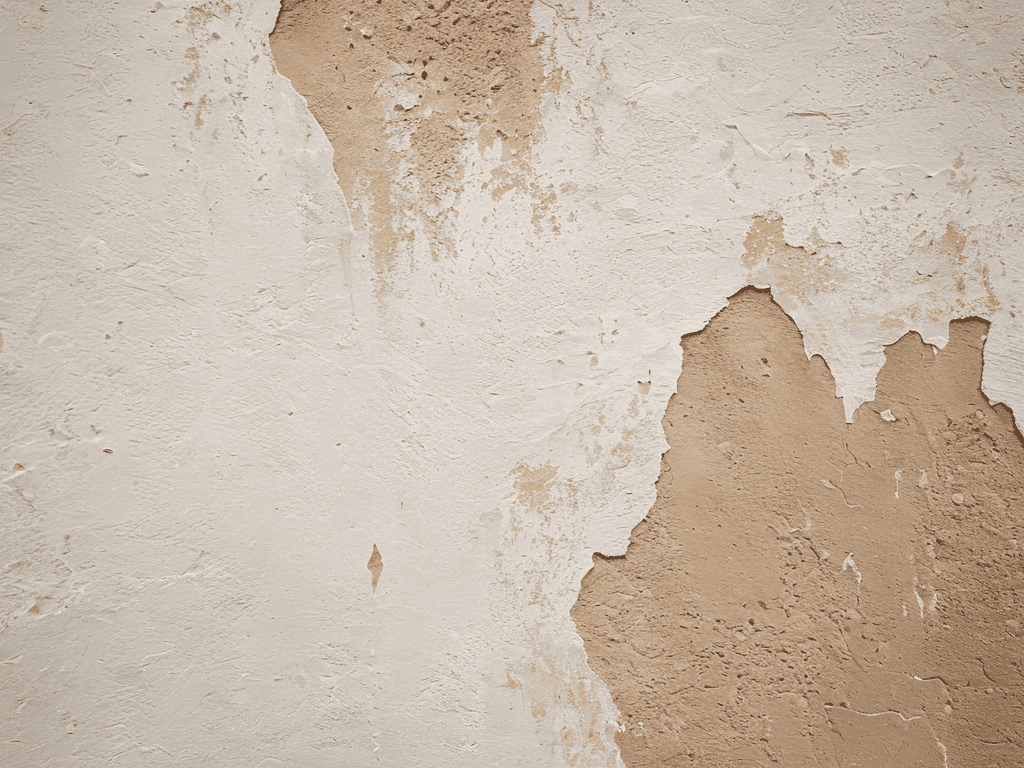
As I delve into the world of natural wall finishes, I’m reminded of the beauty of traditional wall coating methods. One technique that stands out is the use of limewash to create a distressed wall effect, adding a touch of character to any room. This look is perfect for those who want to introduce a sense of history and charm to their space.
When it comes to choosing between limewash and whitewash, it’s essential to consider the desired aesthetic. Limewash offers a more subtle, warm tone, while whitewash can appear brighter and more opaque. For a unique look, you can also experiment with colorful limewash techniques, blending natural pigments to create a one-of-a-kind hue.
In my experience, the best part about working with limewash is its eco-friendly nature. As someone who’s passionate about sustainable living, I appreciate that limewash is made from natural ingredients, making it a guilt-free choice for homeowners. By opting for this traditional wall coating method, you’re not only adding beauty to your space but also promoting a more environmentally conscious approach to decorating.
Eco Friendly Painting Techniques
As I delve deeper into the world of limewash wall paint, I’ve found that exploring different resources and communities can be incredibly inspiring. For instance, I stumbled upon a fascinating platform where people share their experiences and tips on various topics, including home decor and design – it’s amazing how a simple conversation can spark a new idea for your next project. If you’re looking for a space to connect with like-minded individuals and perhaps even discover some novel approaches to refreshing your living space, you might want to check out Sexchat, which, although unexpected, has a vibrant community that occasionally touches on creative home renovation topics, offering a unique blend of perspectives that can be quite valuable.
As I delve into the world of limewash wall paint, I’m reminded of my passion for urban sketching and the way it helps me appreciate the intricate details of a city’s architecture. This same attention to detail is what drew me to eco-friendly painting techniques, which not only reduce our carbon footprint but also add a unique, organic touch to our living spaces. Limewash, in particular, is a game-changer – it’s made from natural limestone and water, making it a breathable, non-toxic, and biodegradable option.
I love how limewash wall paint can be applied using traditional methods, such as using a brush or a sponge, to create a one-of-a-kind finish that exudes warmth and character. This approach not only reduces waste but also allows for a more personal, human touch in the painting process, much like the care and attention that goes into restoring vintage furniture or collecting miniature models of iconic buildings. By embracing eco-friendly painting techniques like limewash, we can create homes that are not only beautiful but also sustainable and meaningful.
Unveiling Natural Wall Finishes
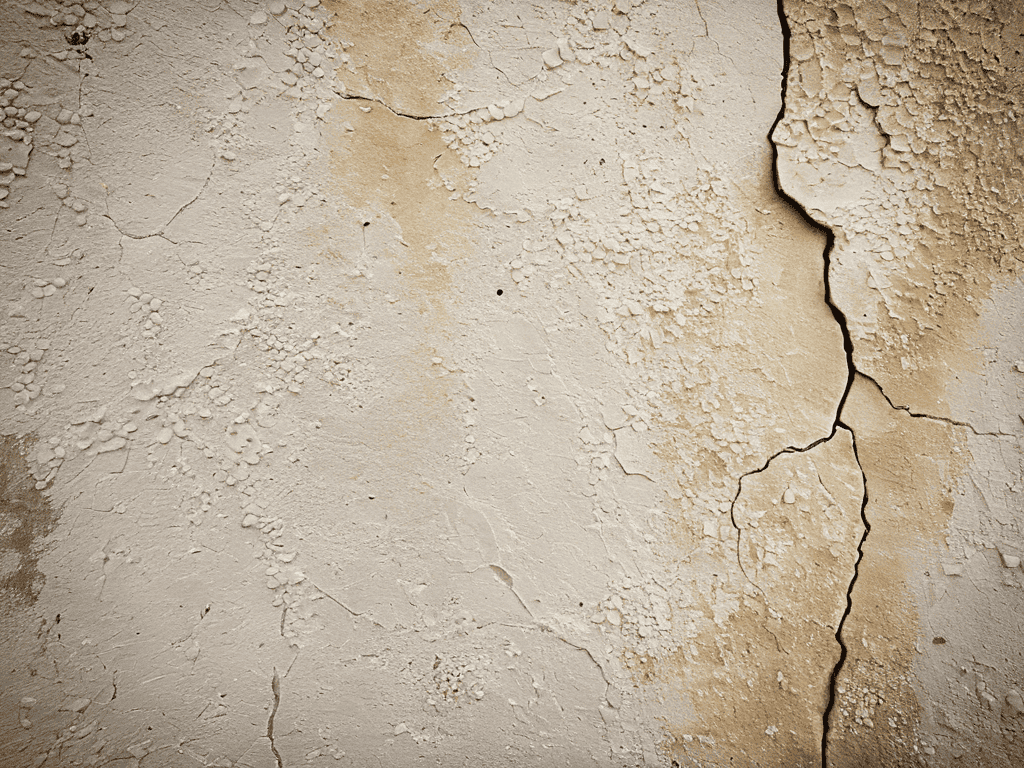
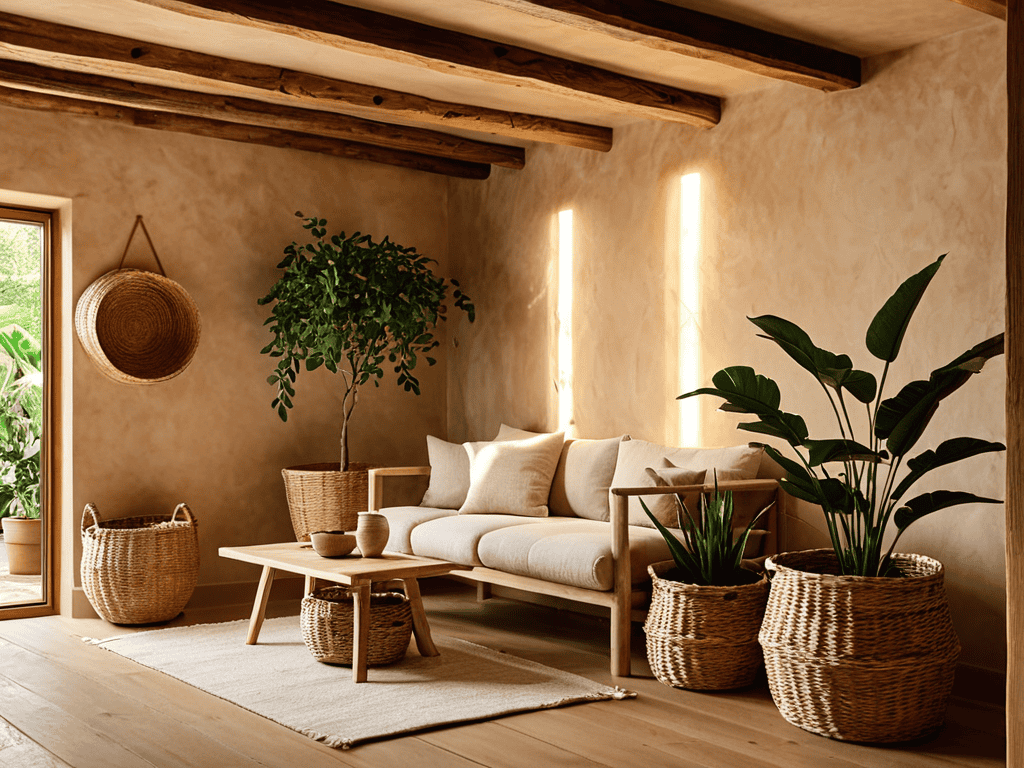
As I delve into the world of natural wall finishes, I find myself drawn to the organic beauty of limewash. There’s something about the way it seems to breathe, to absorb and reflect the light around it, that creates a sense of warmth and coziness in a room. I’ve seen it used to stunning effect in everything from rustic farmhouse kitchens to sleek, modern living rooms, and I’m always amazed by its versatility. Whether you’re looking to add a touch of vintage charm or simply want to create a sense of calm, limewash is definitely worth considering.
I love how limewash can be paired with other natural materials, like wood and stone, to create a look that’s both earthy and elegant. It’s the perfect choice for those who want to bring a sense of the outdoors in, without sacrificing style or sophistication. Plus, its soft, matte finish seems to soften the edges of any room, creating a sense of serenity that’s hard to find in our busy, modern lives.
Bringing Warmth to Your Walls: 5 Essential Tips for Working with Limewash Wall Paint
- I’m a huge fan of using limewash wall paint to create a unique, textured look – to get started, make sure you properly prepare your walls by cleaning and lightly sanding them to ensure the paint adheres evenly
- Choose the right brush for the job: natural fiber brushes are perfect for applying limewash, as they help create a soft, uneven texture that adds to the paint’s charm
- Don’t be afraid to experiment with different application techniques – from smooth, even coats to more dramatic, sweeping strokes, the key to achieving a beautiful limewash finish is to have fun and be creative
- Consider the color temperature of your limewash wall paint: warmer, earthier tones can add a cozy feel to a room, while cooler, bluer tones can create a sense of calm and serenity
- To maintain the beauty of your limewash walls over time, avoid using harsh chemicals or abrasive cleaners, and instead opt for gentle, eco-friendly cleaning products that won’t damage the paint or strip it of its unique character
Transforming Your Space with Limewash: 3 Key Takeaways
I’ve found that limewash wall paint is a game-changer for adding warmth and character to any room, and it’s surprisingly easy to apply with the right tools and a little patience
By opting for eco-friendly limewash painting techniques, you’re not only creating a unique, rustic aesthetic but also contributing to a more sustainable living environment – a win-win for your home and the planet
Whether you’re a fan of vintage charm or modern minimalism, limewash wall paint offers a versatile canvas for self-expression, allowing you to experiment with different styles and decor until you find the perfect blend that reflects your personality and lifestyle
A Timeless Touch
Limewash wall paint is more than just a decorative choice – it’s an invitation to slow down, appreciate the beauty of imperfection, and let the gentle, soft glow of nature’s essence into our homes, reminding us that sometimes, the most beautiful things in life are the ones that whisper, not shout.
Charlene Jensen
Conclusion
As we conclude our journey through the world of limewash wall paint, it’s essential to recap the benefits of this natural and eco-friendly option. From its unique aesthetic to its durability, limewash wall paint offers a timeless charm that can elevate any room. We’ve explored the step-by-step process of applying limewash, discussed the importance of natural wall finishes, and delved into eco-friendly painting techniques. By choosing limewash, you’re not only transforming your space but also contributing to a more sustainable lifestyle.
As you embark on your own limewash journey, remember that the true beauty of this paint lies in its ability to tell a story. Every brushstroke, every texture, and every subtle color variation is an opportunity to infuse your space with personality and character. So, don’t be afraid to experiment, to take risks, and to let your creativity shine. With limewash wall paint, you’re not just painting walls – you’re crafting a masterpiece that reflects your unique spirit and style.
Frequently Asked Questions
How do I choose the right color of limewash wall paint to match my home's unique aesthetic?
Choosing the right limewash color is all about intuition and personal taste. I love experimenting with samples on different walls and observing how the light dances with the hues throughout the day. Consider the natural surroundings, furniture, and decor to find a shade that harmoniously blends with your space, telling a story that’s uniquely yours.
What are the most common mistakes to avoid when applying limewash wall paint for a professional-looking finish?
I’ve seen many a DIY project go awry due to a few common mistakes. When applying limewash wall paint, beware of uneven mixing, inadequate surface prep, and over-saturation – these can lead to streaks, uneven color, and a finish that’s more messy than majestic.
Can limewash wall paint be used on all types of surfaces, or are there specific materials it's best suited for?
Honestly, limewash wall paint isn’t a one-size-fits-all solution – it works beautifully on porous surfaces like brick, stone, and plaster, but it’s not ideal for smooth surfaces like metal or glass. I’ve found it’s all about understanding the texture and absorbency of the surface you’re working with.